Loginizer plugin is a powerful plugin for WordPress site security. You can easily configure the settings, and your site will be protected from bots and other malicious programs. The installation is very quick and easy. However, the plugin provides only brute force protection settings in the free version. If you want to use the other features of the plugin, then you can purchase the pro version.
Brute Protection provides high security for the login page. It will block the IPs trying to brute force your website for 15 minutes after three failed login attempts. After multiple lockouts, it will block the IP for 24 hours. Moreover, you can also show error messages to users who have more than specific attempts for login. You will be able to enter the blacklist and whitelist IPs. These features are accessible in the free version. However, the pro version provides re-captcha, two-way authentication, passwordless, and security settings.
Password Less login provides easy login options for users. At the time of login, the username/email address will be asked, and an email will be sent to the email address of that account with a temporary link to log in. You will also have two-way authentication via email in the pro version. On login, an email will be sent to the email address of that account with a temporary 6-digit code to complete the login. Moreover, you will have two-way authentication via app feature as well. In this feature, the users can configure the account with a 2FA App like Google Authenticator, Authy, etc.
You can also add re-captcha in the login or connect sections. The plugin provides Google’s re-captcha v3 and v2 configuration for the Login screen, Comments Section, Registration Form, etc., to prevent automated brute force attacks. Moreover, it also supports Woo-commerce. If you would like to ban new registrations from a particular domain, you can use the new registration domain blacklist feature. You will also have an auto blacklist IPs feature. So basically, it will auto blacklist the IPs if specific usernames saved by the admin are used to log in by malicious bots/users. These all features are accessible in the pro version. So, let’s discuss the basic features of this plugin in brief,
Features:
- The plugin provides an easy-to-use interface and fast setup.
- Loginizer offers only brute force protection settings in the free version. If you want to use the re-captcha and other security settings, then you can upgrade to the Pro version.
- However, you will have multiple options to configure in the Brute Force settings. You can set the limiting values for retries, lockout time, and email notifications.
- Moreover, you can also send error messages to users who have tried to log in or log out more than specific limits.
- It allows you to blacklist specific user IPs in the free version. You can have the auto blacklist IPs feature into the Pro version.
- You will also have two-way authentication via email in the Pro version. Thus, it will send the email to the email address of the accounts with a temporary six-digit code to complete the login.
- The plugin allows Google’s re-captcha v3 and v2 configuration for the Login screen, Comments Section, Registration Form using this plugin.
- The plugin will auto blacklist the IPs if specific usernames saved by the admin are used to log in by malicious bots/users.
- Password-less login provides easy login options for users. At the time of login, the username or email address will be asked, and an email will be sent to the email address of that account with a temporary link to log in. However, this feature is available in the Pro version.
- You can share with your friends that your site has been secured using this plugin’s brute protection feature via Twitter.
- Also, the plugin has a page layer and WPcentral integration. Page layer builder is used to manage and make professional pages and content. While WPCentral allows you to manage multiple WordPress sites from one dashboard.
Pricing Details:
Loginizer offers four paid plans – Personal, blogger, professional, and business plan. You will get the license for up to 100 sites. A personal plan costs $24 per year, and you will have a license for one site. It also comes with one year of support and plugin updates. Blogger plan costs $40 per year and comes with a license for two sites. Also, the professional plan retails for $90 per year and provides a license for ten sites. The business plan offers a license for up to 100 sites that costs $150.
How to Install and Activate Loginizer Plugin
The installation process is very easy. You can just follow the simple steps mentioned below to install and activate the plugin.
Step 1: First, you need to log in to the WordPress admin dashboard.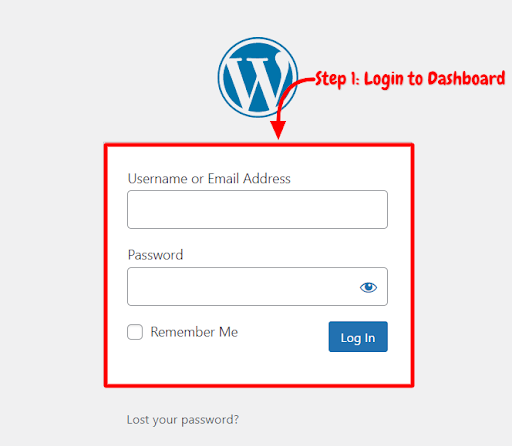
Step 2: Now, you will see the option “Plugins” on the left-hand side panel. Click on “Plugins,” then select “Add New.”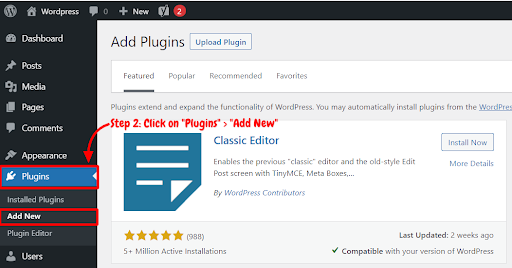
Step 3: You will see a search bar on the top right-hand side corner. Search “Loginizer Plugin”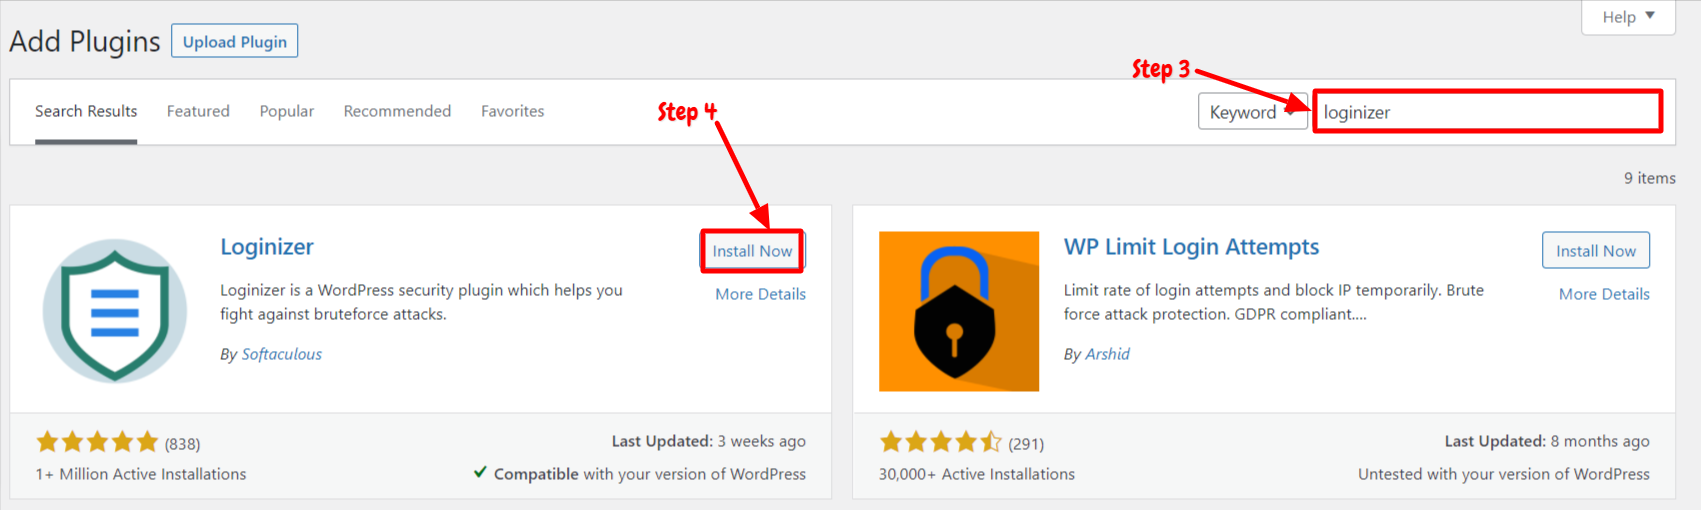
Step 4: Now, you need to click on “Install Now.”
Step 5: After installation, you need to activate the organizer plugin in order to use it on your site. Now, click on “Activate.”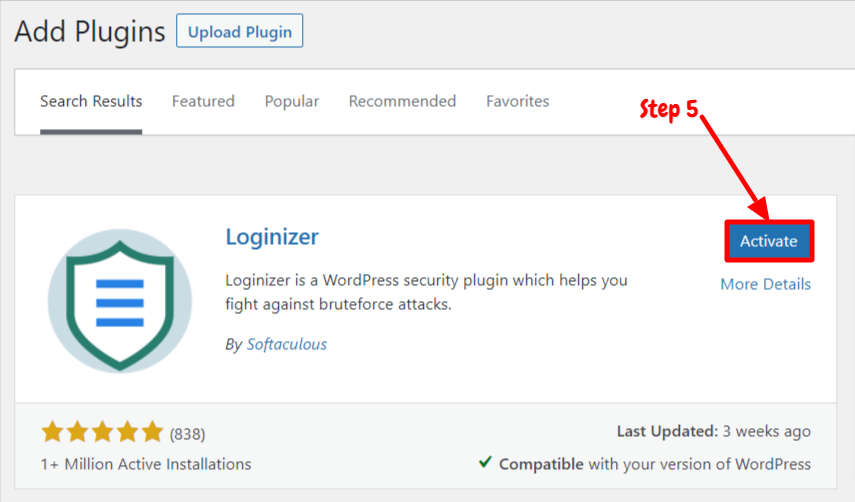
Now you have successfully installed and activated the plugin. You just have to do a few settings for your site security.
How To Configure The Site Security Loginizer Plugin
After activating the plugin on your site, you can start using this plugin on your site. You can now start configuring your site security settings using this plugin. We have explained step by step guide below on how to use this plugin,
Step 1: First, go to the “Loginizer Security” option available on the left side panel of the WordPress dashboard. Choose “Brute Force“.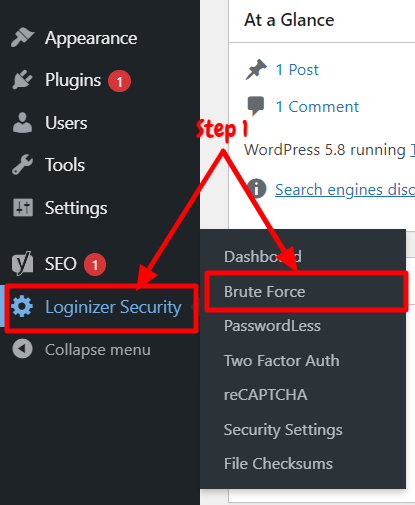
Step 2: You will be directed to the “Brute Force Settings” page. You will have four sections to configure the brute force settings. Now, first, scroll down to “Brute Force Settings”. You can customize and set many fields in this section. You will have maximum lockout and retries options for the security of your site. There will be various fields like,
Max Retries – Enter the number of failed login attempts that are acceptable before the lockout.
Lockout Time – Enter the number of minutes you would like the duration of the lockout to be.
Max Lockouts – Enter the number of lockouts that are acceptable before an extended lockout occurs.
Extend Lockout – Enter the number of hours you would like the duration of an extended lockout to be.
Reset Retries – Enter the number of hours you would like the number of retries to be reset.
Email Notification – Enter the number of lockouts that are acceptable before receiving an email notification.
You can configure and set the above fields the way you want. After configuring these values, click on “Save Settings “. You can also disable the Brute Force protection.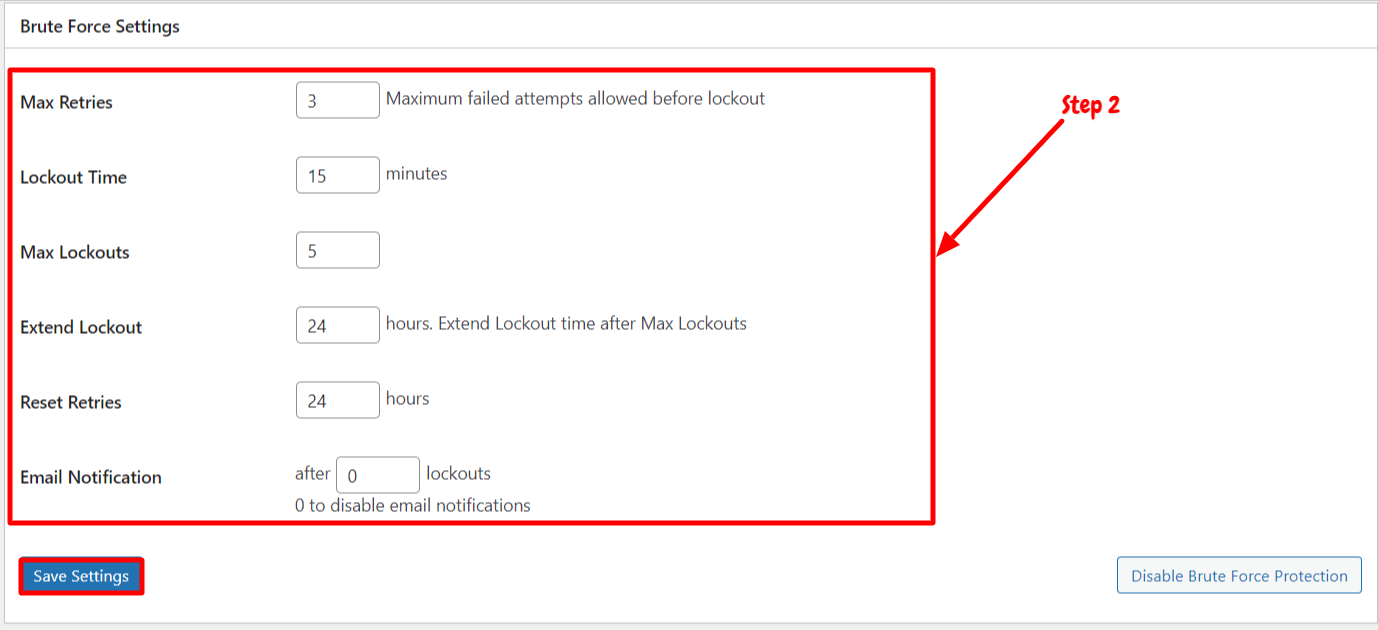
Step 3: Now, scroll down to blacklist and whitelist IPs. You can enter the IPs which you want to blacklist or whitelist. You can also add blacklist or whitelist IPs range by click on “Add Blacklist and Whitelist range.”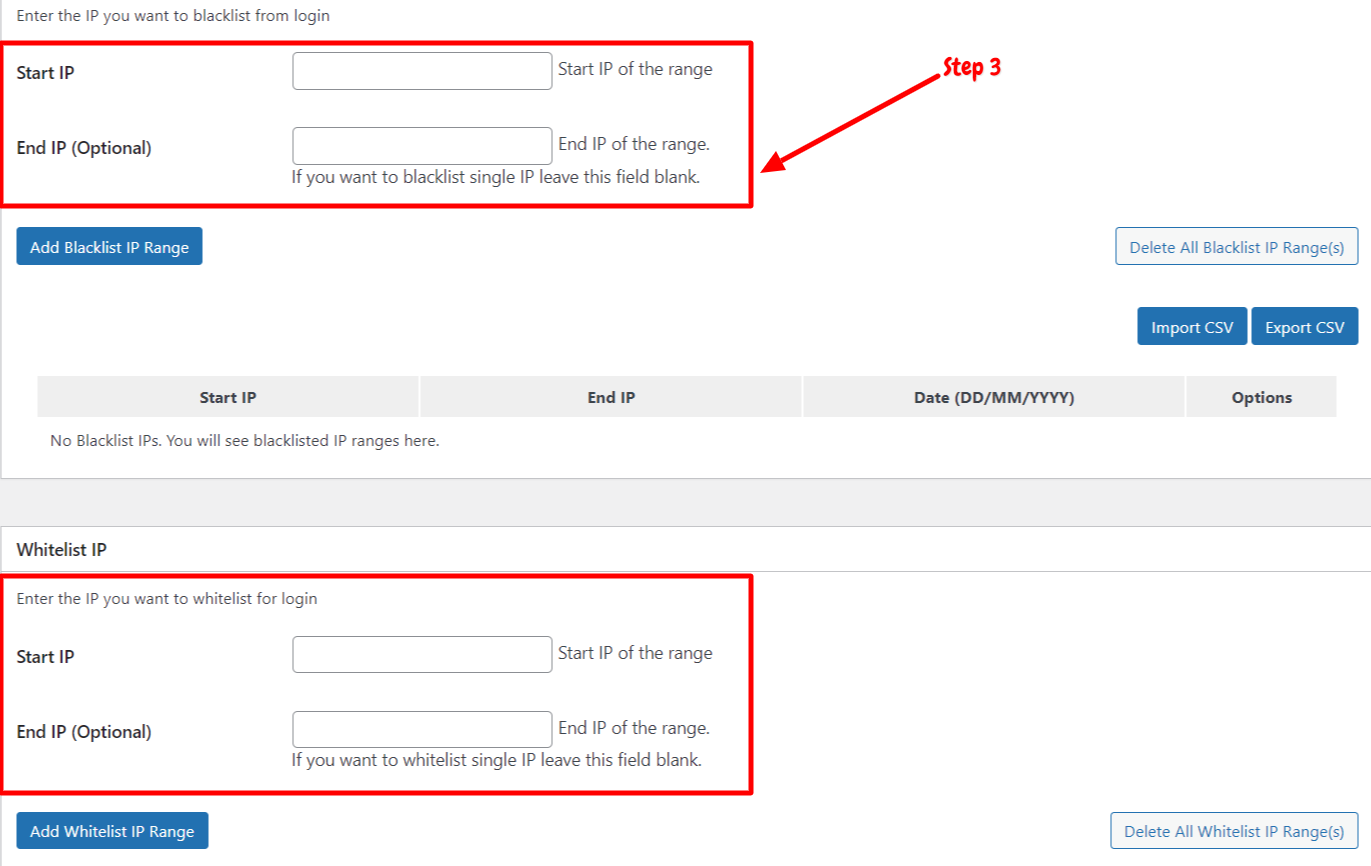
Step 4: Next step will be the “Error Message” section. You can easily customize the error message as well. In the Failed Login Attempt Field, type your custom error message. This message will appear for the end-user every time a failed login attempt occurs.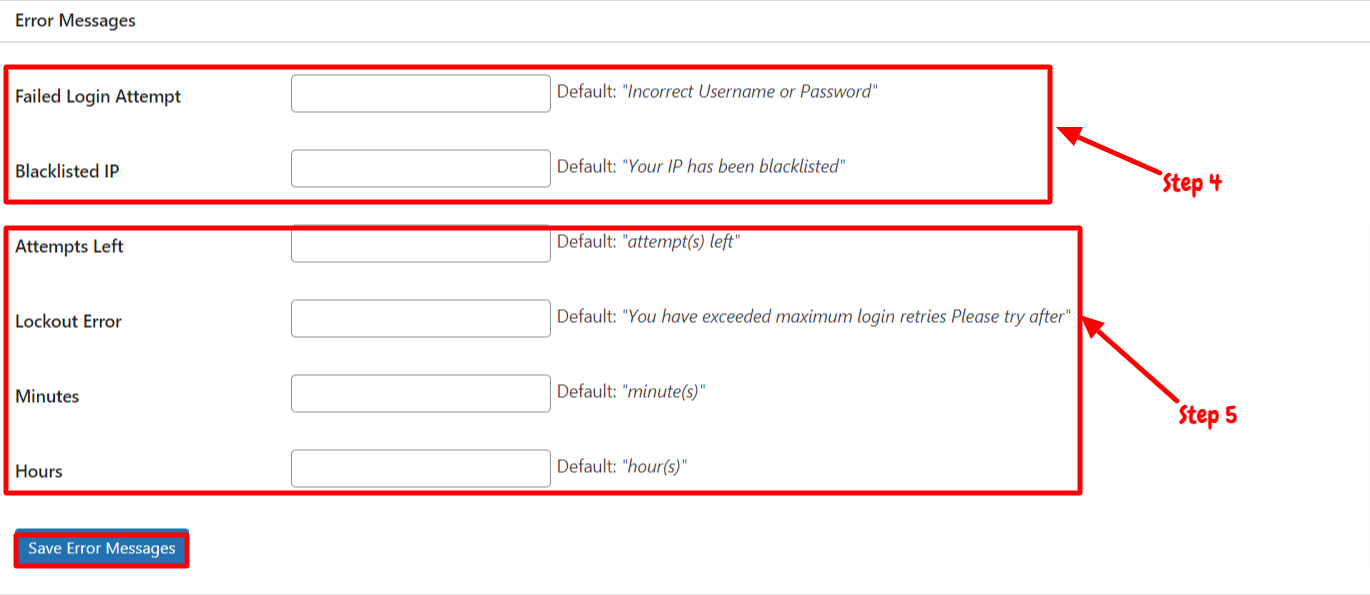
Step 5: In the Blacklisted IP field, type your custom error message. This message will display if a login attempt is made from an IP address that is blacklisted. Likewise, you can also show error messages for attempts left, lockout error, minutes, and hours left. Now, click the Save Error Messages button to preserve your changes.
However, the organizer plugin provides only brute force settings in the free version. The rest of the settings, including re-captcha, password-less, and security settings, are available in the Pro version. You can upgrade to the Pro version if you want to unlock the advanced options of this plugin. The plugin will also allow you to share the site security message to your friends by tweeting.
Conclusion
Loginizer is the most popular WordPress security plugin in the market. You will have multiple options to secure your websites from malicious bots. However, the plugin allows you to access only brute force protection settings in the free version. You can also add re-captcha in the login, comments, and registration forms. The plugin lets you set the limiting values for lockouts and login retries.
Moreover, you can also send email notifications to the users after specific lockouts. You can also blacklist or whitelist the specific IPs. The Pro version provides many more advanced features. The installation process is very simple and quick. You can follow the above guide on how to install and activate this plugin.
We have also explained the step-by-step guide on how to configure your site security using this plugin. We hope this article will help you to secure your site using Loginizer.
