What is ReCAPTCHA?
ReCAPTCHA is a free Captcha service from Google. It assistances to protect websites from spam and malicious bots. A “CAPTCHA” is a Turing test to tell humans and bots apart. It is easy for humans to solve but hard for “bots” and other malicious software to figure out. By adding ReCAPTCHA to a site, you can block automated software while assisting your users to enter easily. It is a free service that protects your site from spam and abuse. It uses advanced risk analysis techniques to tell humans and bots apart.
ReCAPTCHA V3
ReCAPTCHA v3 helps you detect abusive traffic on your website without user interaction. Instead of showing a CAPTCHA challenge, ReCAPTCHA v3 returns a score so you can choose the most appropriate action for your website.
ReCAPTCHA V2
The “I’m not a robot” Checkbox requires the user to click a checkbox. That indicates the user is not a robot. This will either pass the user immediately (with No CAPTCHA) or challenge them to validate whether or not they are human. This option is the simplest to integrate with and only requires two lines of HTML to render the Checkbox.
ReCAPTCHA Invisible
The invisible ReCAPTCHA badge does not need the user to click on a checkbox; rather, it is invoked directly when the user clicks on an existing button on your site. Or it can be invoked via a JavaScript API call. The integration requires a JavaScript callback when ReCAPTCHA verification is complete. By default, only the most suspicious traffic will be prompted to solve a captcha. In order to alter this behavior, moderate your site security preference under settings.
ReCAPTCHA By BestWebSoft
ReCAPTCHA By BestWebSoft is an effective security plugin in the market. It protects website forms from spam entries while it allows legit entries. The functionality (ReCAPTCHA) can be used for log-in, registration, password recovery, comments, popular contact forms, and many more. There are three versions available ReCAPTCHA Version 3, Version 2, Invisible.
Users must check the box of “I am not a robot” in order to pass through the log-in or restoration process. Thus. It’s easy for people and difficult for bots to pass the process. You can easily add ReCaptcha in the registration form, login form, Reset password form, comments form, and testimonials. Moreover, you can also add the ReCaptcha in custom forms as well. The plugin supports more than 39 language translations. Developers constantly update the existing translations and add new ones to the list. Thus, you will have many more languages with every update. Moreover, you can manually select the language for ReCaptcha. Recaptcha plugin also provides the shortcode to embed the ReCaptcha in any form, page, or post.
Using this plugin, you can hide the ReCaptcha for specific IP addresses and certain user roles. You will have two ReCaptcha themes for version 2, consisting of light and dark. You can also add custom codes to embed or create the ReCaptcha on your own. The plugin provides easy to use and quick setup without modifying the single code. It is compatible with the latest WordPress version. Moreover, it supports derailed step-by-step documentation and videos. You can also hide the ReCaptcha badge in version 3 and invisible. These all features are available in the free version. So, let’s discuss the basic features in brief,
Features
1. The Pro version is compatible with Contact Form 7, JetPack forms, MailChimp, and WPForms. Thus, you can simply use this plugin with any contact form builder plugin. However, the free version is only compatible with registration, log-in, and custom forms.
2. The Pro version of the plugin is also compatible with Woocommerce. It supports checkout billing forms, log-in or registration, and Lost password forms.
3. The functionality (ReCAPTCHA) can be used for log-in, registration, password reset, comments, popular contact forms, and many more.
4. There are three versions available ReCAPTCHA Version 3, Version 2, Invisible.
5. Moreover, you will have many integrations and compatibility along with the Pro version. You will have Divi, BuddyPress, and Ultimate member compatibility as well.
6. You can select ReCaptcha languages manually both in the free and Pro version.
7. Moreover, you can easily change the size of the ReCaptcha from normal to compact. However, that is only available in ReCaptcha version 2. The free version doesn’t provide this feature.
8. The plugin is compatible with WordPress versions and themes.
9. It provides easy to use and quick setup without modifying the single code.
10. The plugin supports more than 30 language translations. Developers constantly update the existing translations and add new ones to the list.
11. Using this plugin, you can hide the ReCaptcha for specific IP addresses and certain user roles.
12. You can also hide the ReCaptcha badge in version 3 and invisible.
13. The plugin also provides the shortcode to embed the ReCaptcha in any form, page, or post.
14. Moreover, it supports detailed step-by-step documentation and videos.
Pricing Details
Recaptcha plugin has three paid plans- Annual, lifetime, and Membership. The annual plan consists of all premium features, updates for one year, and priority support. This plan costs $20.99 per year per domain. The lifetime plan costs $211 per domain. The Membership plan retails for $250 per year per domain. Also, this plan comes with access to all the updates and all premium plugins. Moreover, you will get premium personal support.
How to install and Activate the ReCAPTCHA Plugin
The installation process is straightforward. You can just follow the simple steps mentioned below to install and activate the plugin.
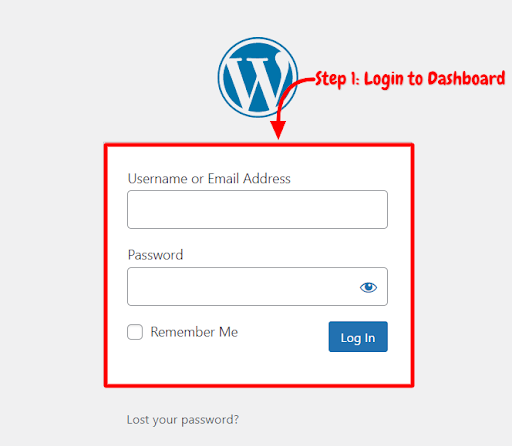
Step 1: First, you need to log in to the WordPress admin dashboard.
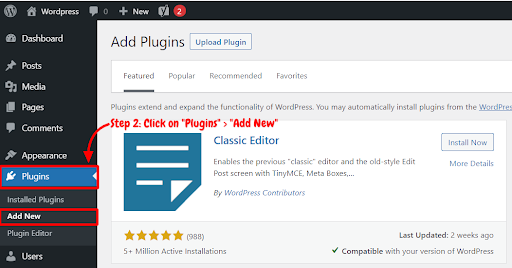
Step 2: Now, you will see the option “Plugins” on the left-hand side panel. Click on “Plugins,” then select “Add New.”
Step 3: You will see a search bar on the top right-hand side corner. Search “ReCAPTCHA”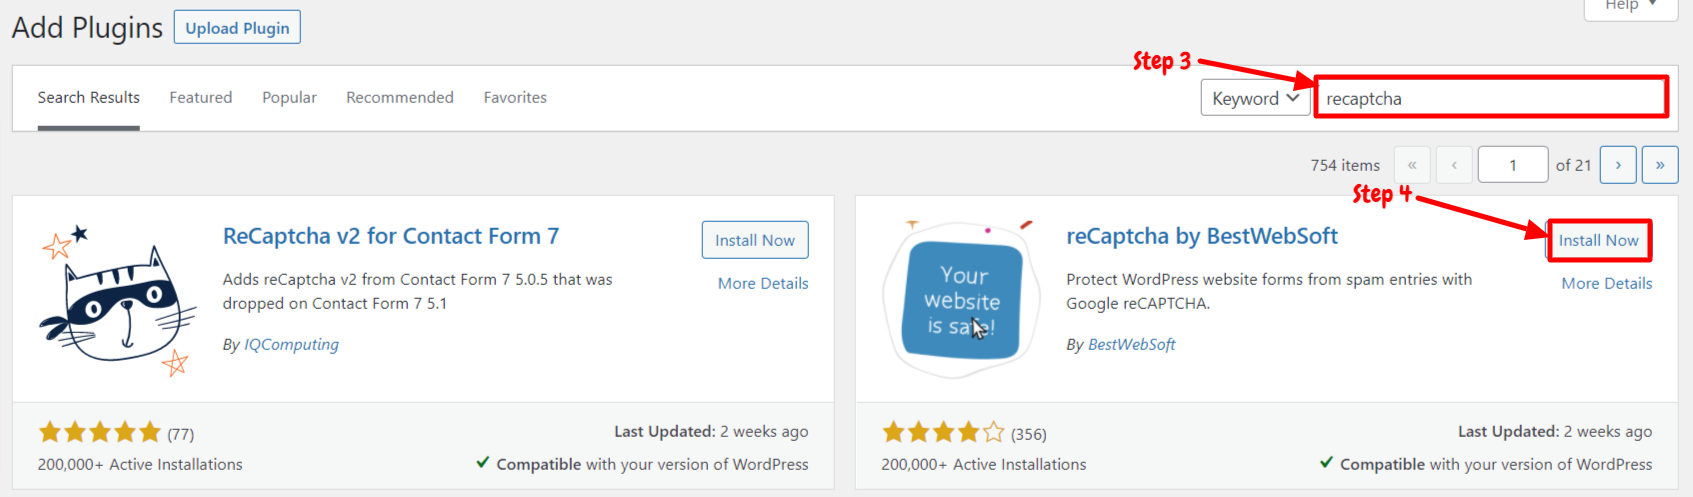
Step 4: Now, you need to click on “Install Now.”
Step 5: After installation, you need to activate WP-ReCAPTCHA in order to use it on your site. Now, click on “Activate.”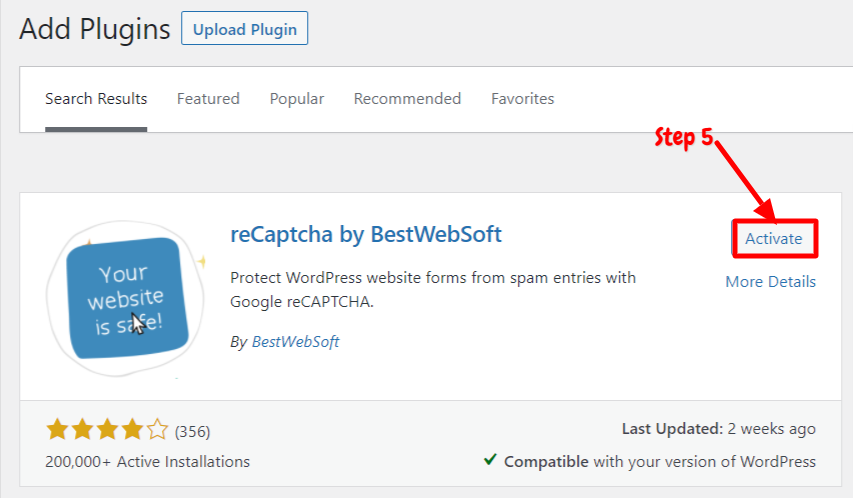
Now you have successfully installed and activated the plugin. You can add ReCAPTCHA on any post or page using shortcodes.
How to Use ReCAPTCHA Plugin by BestWebSoft
After activating the plugin, you will need to do some settings within the WordPress dashboard. We have explained the step by step guide on how to use or set up the ReCAPTCHA plugin below,
Step 1: First, Go to the “Recaptcha” option available in the left-hand side panel. And then select “Settings.”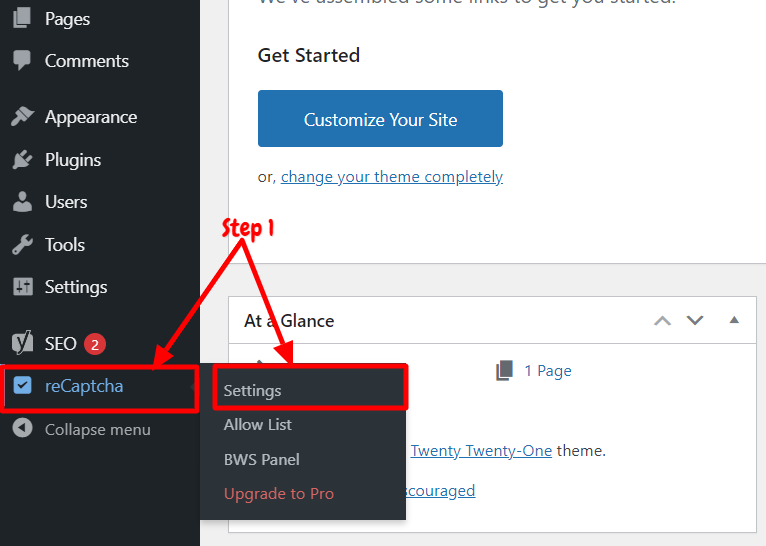
Step 2: Now, you will be directed to ReCaptcha settings. You will have four tabs – Settings, Misc, Custom codes, and license key. Now, you need to do some settings. Click on the “Settings” tab.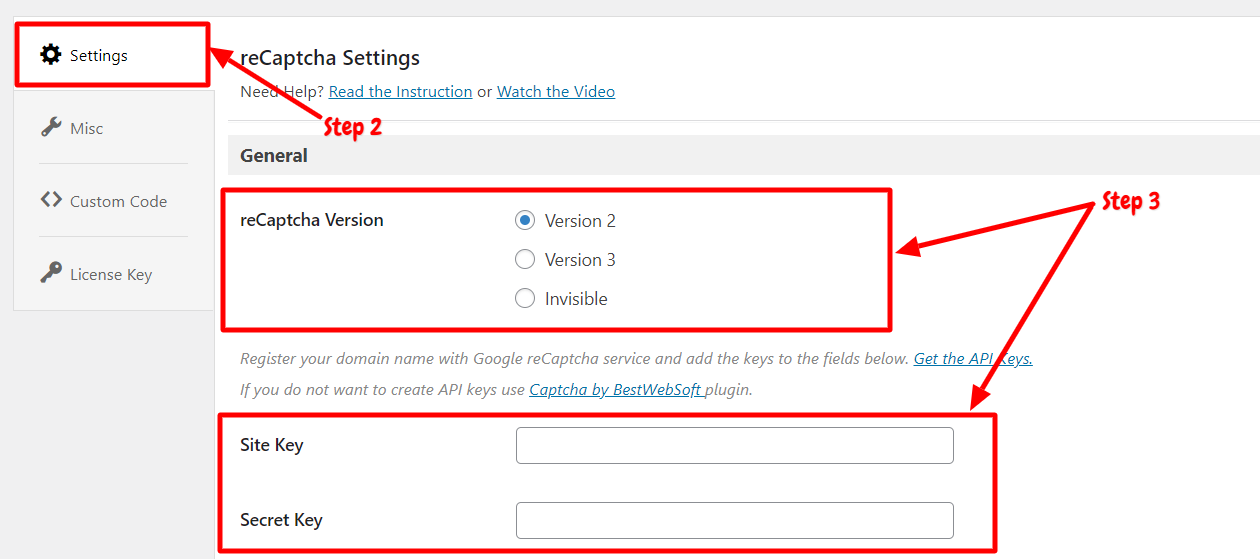
Step 3: In the settings tab, you will have many sections like the “General” ReCaptcha domain. Themes and additional protective measures. Now, you need to choose the ReCaptcha version. Select any one form version 1, 2, and invisible as per your choice.
After that, you need to enter the API key and Secret key; you can get the Site API key and secret key by registering your site on “Google ReCaptcha service” or else if you don’t want to create API keys, you can use this plugin.
Step 4: Now, Enable the ReCaptcha for registration, login, reset password, or comment section. You can choose the check box to enable ReCaptcha for any form. There are external plugins options inside the settings too. You can easily install external plugins like Contact form and Testimonial.
Step 5: Choose “ReCaptcha domain. Now you can select the themes from light and dark. This option is only available for ReCaptcha v2.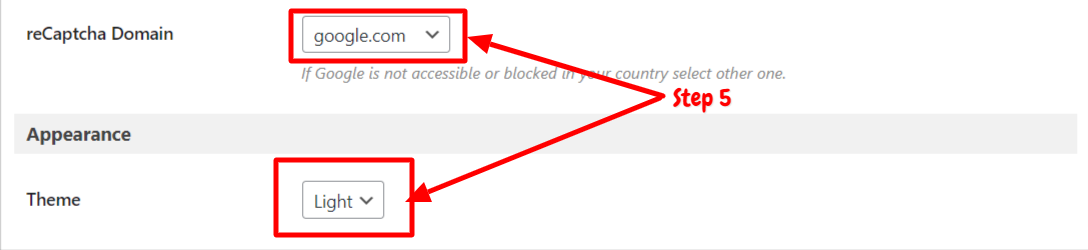
Step 6: Now, scroll down to “Additional Protective measures,” you can check any boxes if you want to hide the ReCaptcha for specific users. You can also disable the submit button in the forms.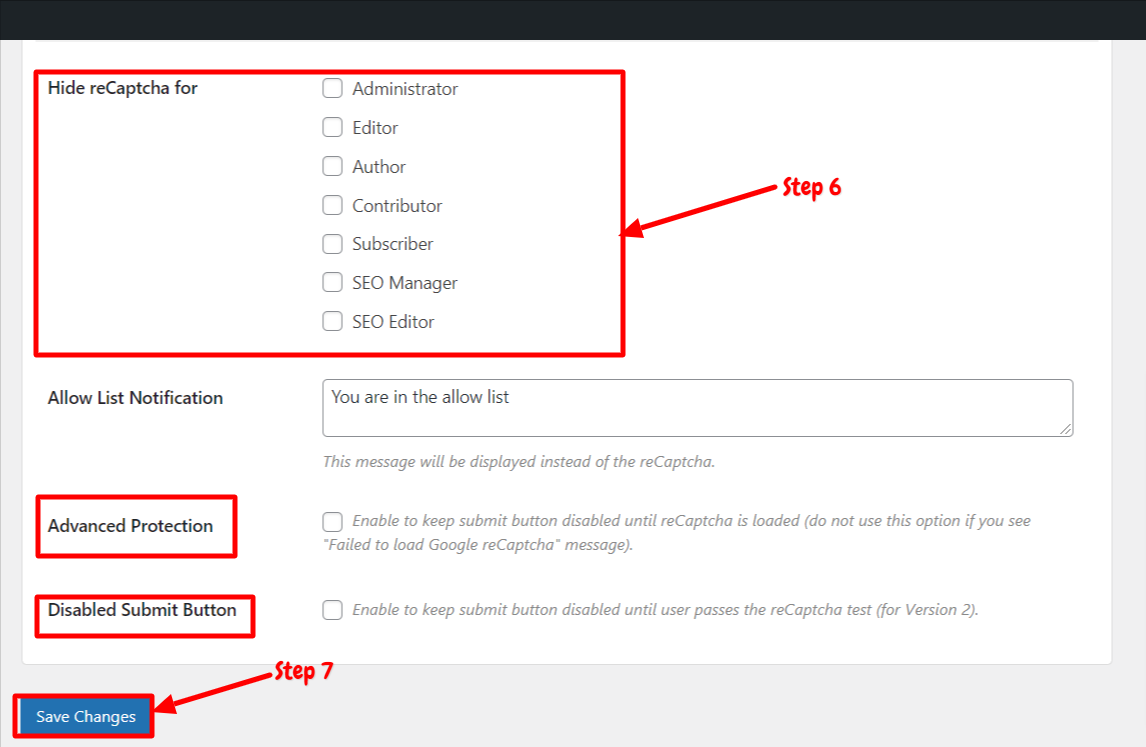
Step 7: Now, click on “Save Changes”
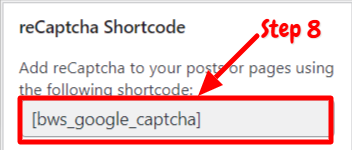
Step 8: After that, copy the shortcode available on the right side corner. Paste the code in the post or any page to display the ReCaptcha.
There are other sections in the settings tab, but it is available only for those who have purchased the Pro version. If you have a Pro license key, then you need to enter the license key in the ReCaptcha license key tab. Moreover, you can also customize the codes for ReCaptcha in the “Custom Code” tab. You can also restore the settings to default in the Miscellaneous settings tab.
Conclusion
Recaptcha by BestWebSoft is a popular security plugin for WordPress sites. The plugin is available in the WordPress plugin directory. However, if you want to unlock more plugin integrations, then you can purchase the Pro version. You will have three options for ReCaptcha – Version 2,3, and invisible in the free version. You can also select themes for ReCaptcha version 2. Moreover, you can ReCaptcha for specific users such as SEO editors, admin, or any. The plugin also provides the shortcode to embed the ReCaptcha in any form or page or post.
Also, you can disable the submit button as well. The plugin installation process is simple; you can follow the steps mentioned above. Also, you can go through our step-by-step guide on how to use the Recaptcha plugin.
We hope this article will assist you to embed the ReCaptcha in any form or post or page.
- 0 Users Found This Useful
