Cloudflare acts as a reverse proxy and it will protect and speed up any website which is online. When your website is using Cloudflare, its web traffic is routed through Cloudflare’s global network. Cloudflare’s network automatically optimizes the delivery of your web pages which results in visitors getting the fastest page load time. The performance of the webpage will be very high as compared to an ordinary one.
What is Cloudflare do?
1) Reduce the load time and provide the best performance
2) Block threats and limit abusive bots

3) Prevent crawlers from wasting your bandwidth and server resources
4) Decreases spam and other attacks.
Create a Cloudflare account and Add a Website
Signing up for Cloudflare is very easy and needs little time to complete the process. Now we are going to describe how you can create an account and add a website without any errors.
1) Go to www.Cloudflare.com and click the ‘Sign Up’ button at the top of the page.
2) Create a Cloudflare account with your email address and password. Click ‘Create account’ to proceed. You will get an interface like the one below.
3) Enter your domain name and click on the button ‘Scan DNS Records.
Adding ‘www’ before the domain name is not compulsory. For instance, if your website is www.domain.com, you can simply type “domain.com”.
4) Cloudflare will initiate a scan for your DNS records and this will complete after 60 minutes. After the completion of the DNS scan, you can go ahead by clicking on the ‘Continue’ button.
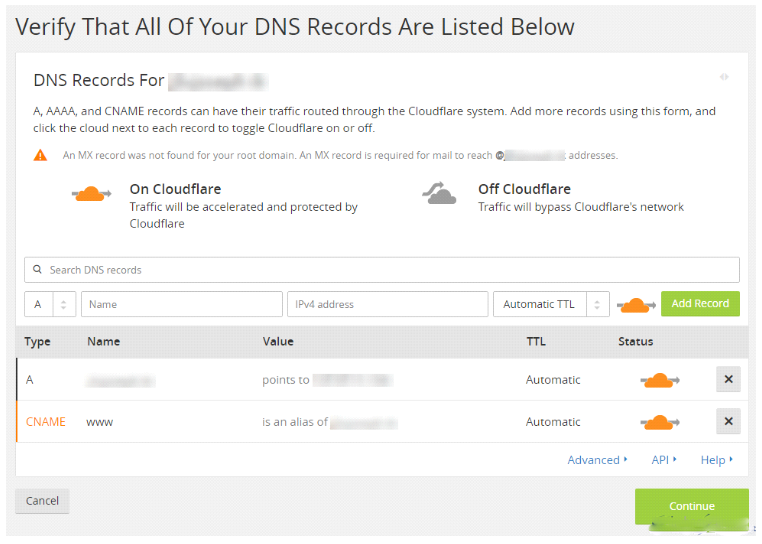
5) You will get a list of all DNS records, including your subdomains. From here, you can decide which subdomains you want to enable Cloudflare. If there are any additional records you want to add, you can add them here. Finally, click on the ‘Continue’ button.
6) A new window will open and here you can choose a plan as per your needs and then click on the ‘Continue’ button.
7) Then you can add Cloudflare nameservers for your domain. Once you complete the process, you will get listed Cloudflare nameservers on this page.
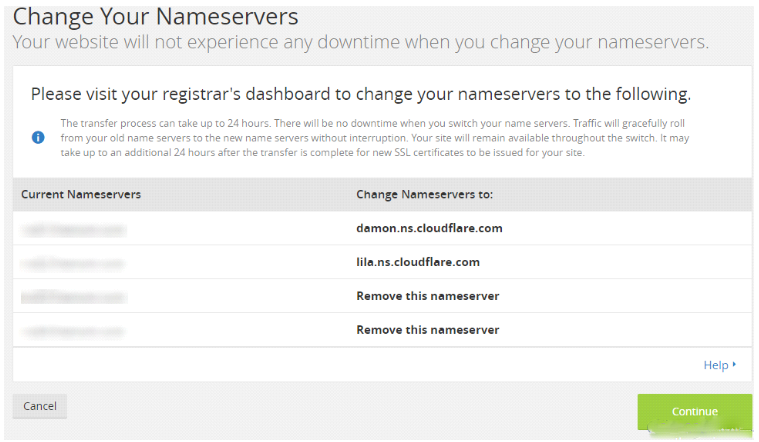
Cloudflare nameservers can be found in your Cloudflare dashboard under Overview.
8) Click on the ‘continue’ button.
9) Once you complete the process you will get a message like “Congratulations! You’ve successfully created your new Cloudflare account!”
10) The final step is to change the nameservers for your domain from your domain registrar's end.
Change Nameservers from Your Domain Registrar End
1) log in to your Cloudflare account and note down your nameservers.
2) Confirm the domain registrar and login to your registrar account.
3) Update Cloudflare nameservers.
4) log in to the Cloudflare dashboard and double-check the changes which you made.
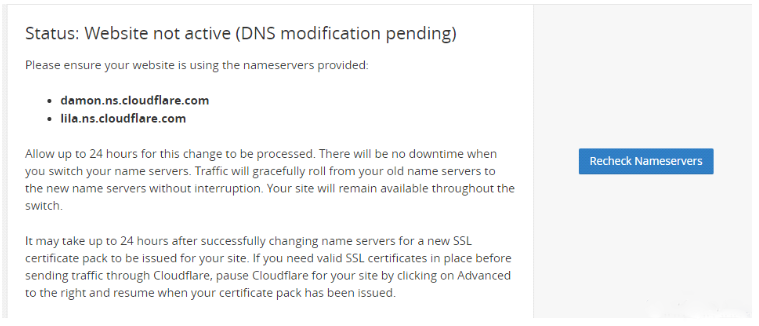
If the status is pending, you will get a message like the below that indicates that your nameserver has not yet propagated or was not updated correctly. The propagation process will take 24 to 48 hours for the changes to be processed globally.
Then you need to Click on “Recheck Nameserver” to recheck your setting.
If you have any further questions or concerns, please contact our support department.
