RDP is a protocol developed by Microsoft, that allows a user to access remote systems graphically. The default Windows servers allow only one remote desktop session at a time. But, in some cases, we are required to enable remote desktop for multiple users to allow access at a time.
You can achieve this by making little changes to the system registry keys. Once the changes are done, multiple users can connect to your system using the RDP client. You can also limit the number of users who can connect at a time.
In this article, we will discuss enabling and disabling multiple remote desktop sessions in Windows server 2012, 2012 R2, 2016, and 2019.
Enable Multiple RDP Sessions
Follow the below steps to enable multiple remote desktop sessions on a Windows system.
- Log in to the Windows system.
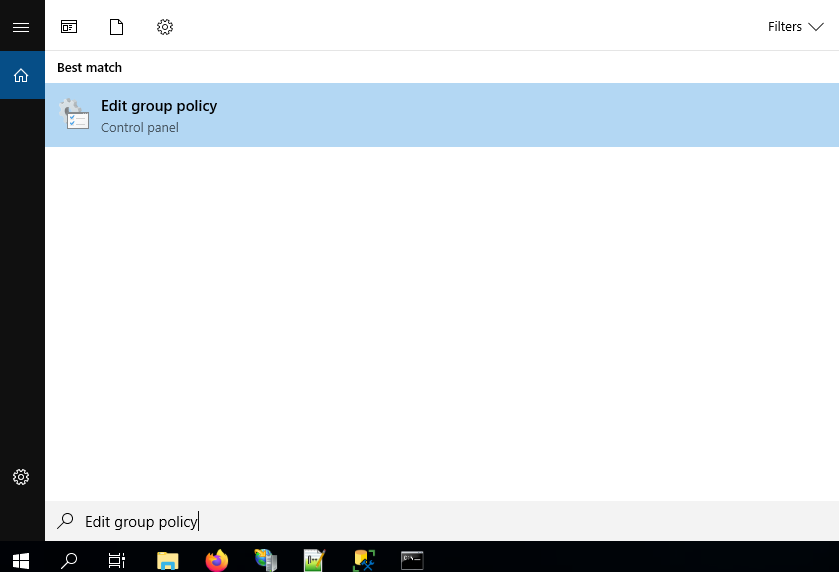
- Open the start screen (press the Windows key) and type “Edit group policy” or “gpedit.msc”, and launch it.
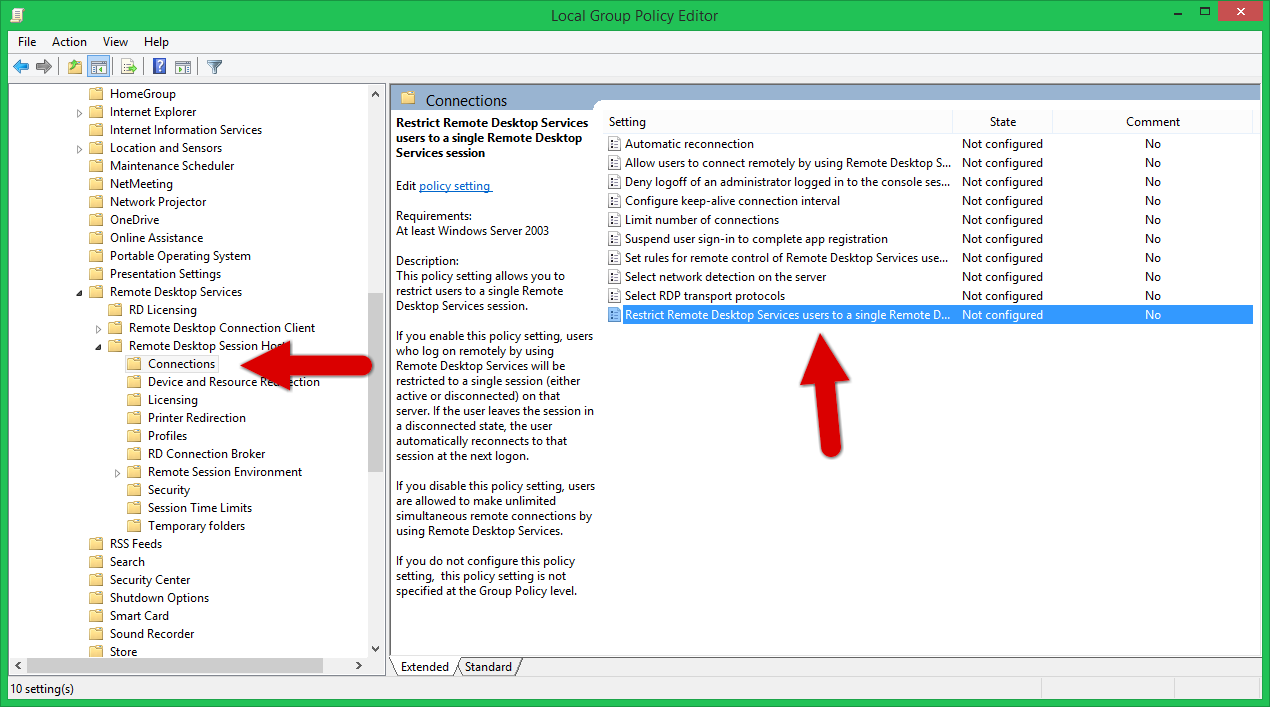
- Navigate to Computer Configuration >> Administrative Templates >> Windows Components >> Remote Desktop Services >> Remote Desktop Session Host >> Connections.
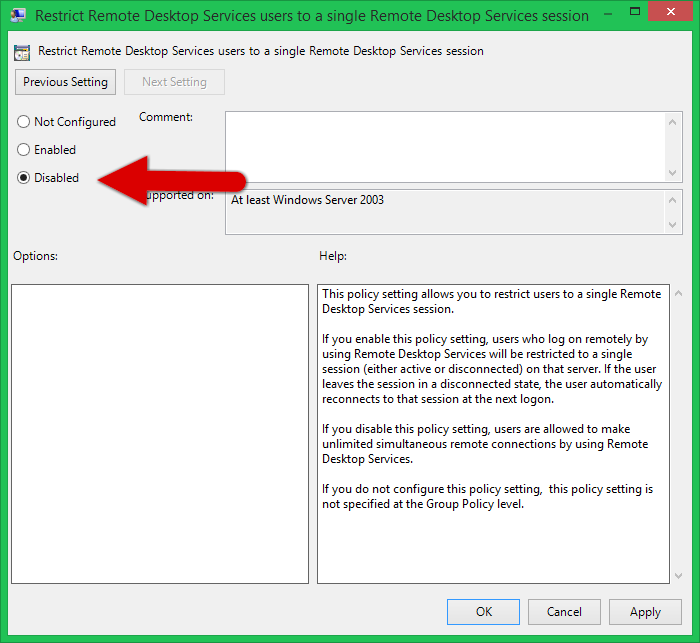
- Double click on “Set Restrict Remote Desktop Services user to a single Remote Desktop Services session and set this to Disabled.
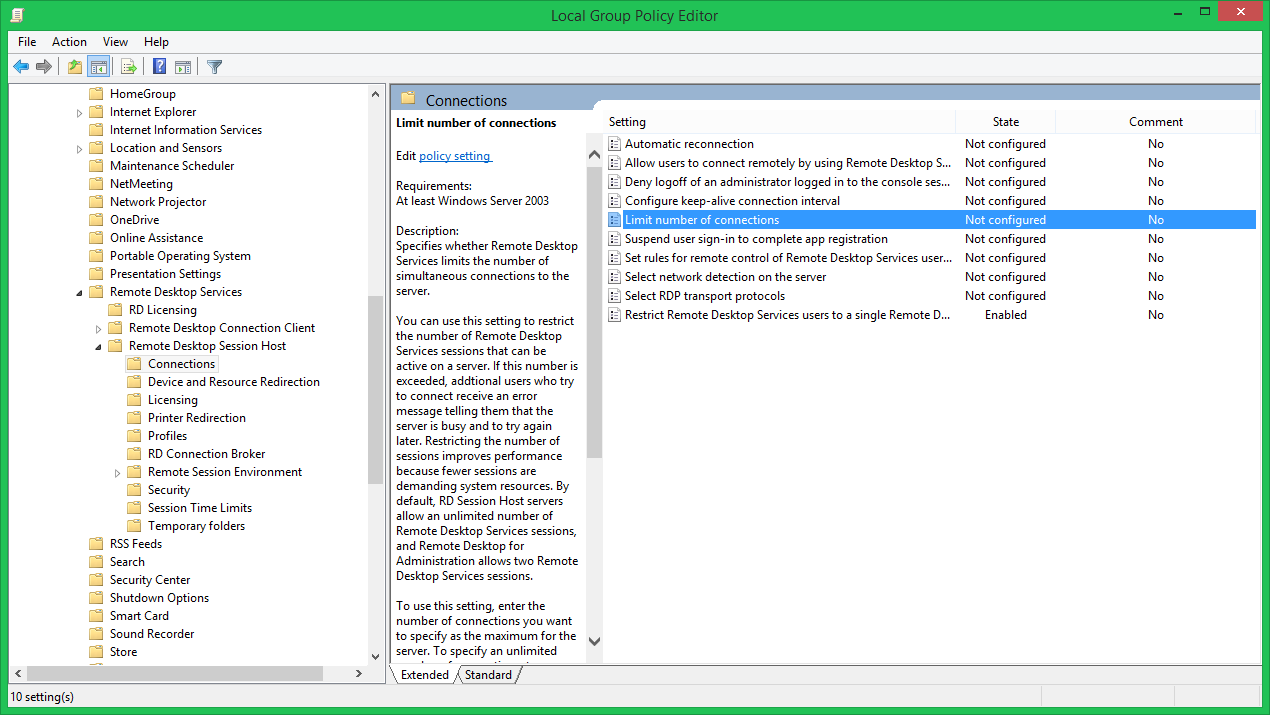
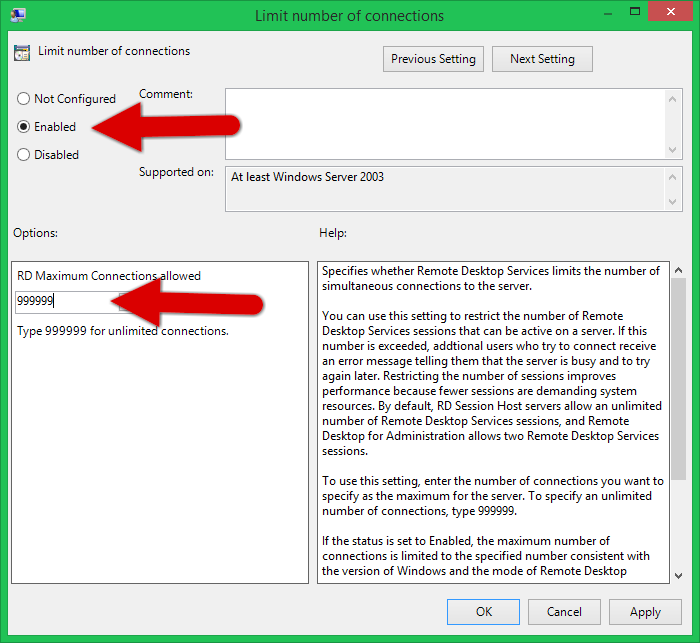
- Next, double click on “Limit number of connections” and set the RD Maximum Connections allowed to 999999. You can also set the limit to 2 to allow two-session only.
Below is the screenshots of changes being made:
Disable Multiple RDP Sessions
To disable the multiple remote desktop sessions, follow the below instructions:
- Log in to the Windows system.
- Open the start screen (press the Windows key) and type “Edit group policy” or “gpedit.msc”, and launch it.
- Navigate to Computer Configuration >> Administrative Templates >> Windows Components >> Remote Desktop Services >> Remote Desktop Session Host >> Connections.
- Double click on “Set Restrict Remote Desktop Services user to a single Remote Desktop Services session and set this to “Enabled.

