What is cPanel?
cPanel is a popular, secure, and effective commercial control panel for web hosting services. It includes many features and can be used through a powerful graphical user interface to manage shared, re-seller, business hosting services, and more.
What is WHM?
cPanel comes with a Web Host Manager (WHM), which makes web hosting easier for web admins as it provides a root and reseller level access interface, where users can manage settings related to server administration and account management. This is while cPanel offers a user-level access interface to manage a web hosting account on the server.
Features and Functions of cPanel/WHM
- Powerful Graphics User Interface to control your server with WHM.
- Supports EV Certificates.
- Supports API Authentication Tokens.
- Now offers AutoSSL supporting Proxy Subdomains.
- Enables you to view SSL Status in cPanel.
- Supports operations such as Backups, Migrations, and restorations in a very easy and smooth manner.
- Also supports excellent DNS and mail server management for the main server as well as client account.
- Supports management (start/stop/enable/disable) of services on server.
- Enables you to configure SSL/TLS for all server services and client domains.
- Easy integration with PHPmyadmin to manage your MySQL databases from a web browser.
- Supports rebranding.
We will now cover how to install cPanel – WHM on CentOS 8.
Note:
- Once you have installed cPanel/WHM, it can’t be removed from your system. You will have to reinstall the operating system to remove it.
- cPanel is commercial software and requires a license to work. However, there is a 15-day trial (which is automatically activated once you install cPanel). You can install your software using the trial, then purchase the software later.
How to Install cPanel-WHM on CentOS 8
Step 1: Check the Hostname of Your Server
Make sure that your server has a standard hostname (FQDN or Fully Qualified Domain Name), otherwise set it as follows (in this example, cPanel is the hostname, and unixcop.lan is the domain name):

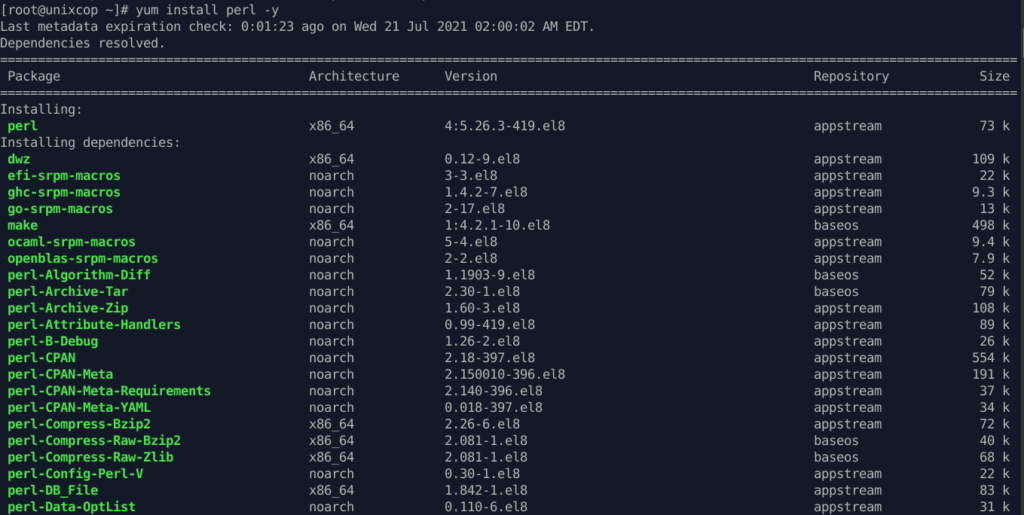
Step 2: Ensure the installation of Perl on Your Server
cPanel is written in Perl, make sure that you have Perl installed on your server.
run the command below to install it on your system.

Step 3: Check cPanel Installer
You do not have to run any commands to install it, there is an auto-installer script built for you. All you have to do is download the cPanel installer script with the cURL command, if you don’t have the cURL command installed, first install it like so.
![]()
Step 4: Download and Run the Latest Installer
Change directory to /home then downloads the latest installer script to it.
And run the auto-installer script sh that its original purpose was to function as a scripting language.

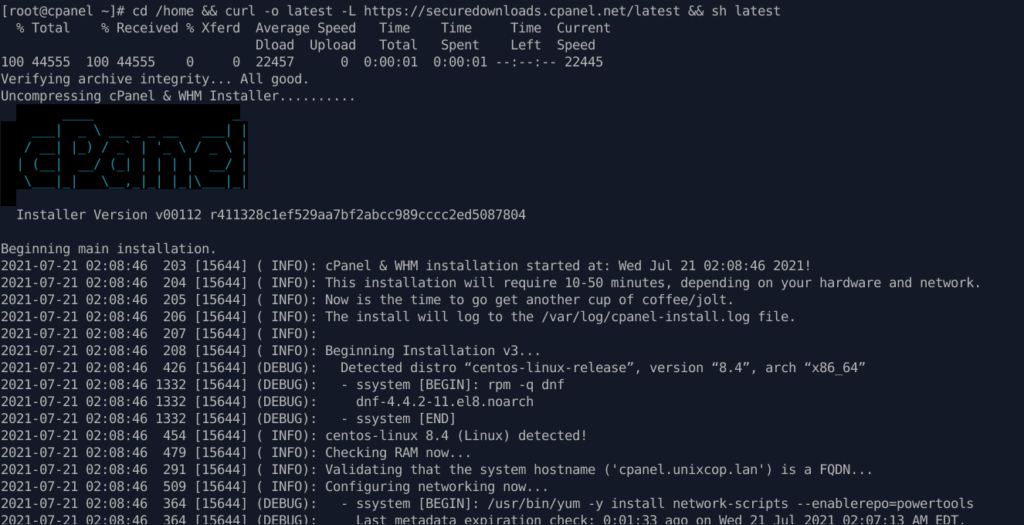
This command changes your session to the home directory, downloads the latest version of cPanel & WHM, and runs the installation script.
Note:
We recommend that you run the installation command within a Linux screen session. The Linux Screen utility allows you to create a shell session that will stay active through a network disruption.
The installation instructions for the Screen utility vary based on your server’s operating system and its package management tools.
1. To determine whether your operating system contains the Screen utility and it exists in your path, run the following command:
- If your system uses yum, run the which screen command. You can install Screen with the yum install screen command.
- If your system uses apt, run the screen –version command. You can install Screen with the apt install screen command.
- To run a Screen session, enter the screen command. Then, run the Screen installation command for your system.
2. If your session disconnects for some reason, log back into your server and run the screen -r command. This will reconnect you to your Screen session.
How The Auto cPanel Installer Script Works:
CPanel will greatly modify your operating system, and this is how the auto-installer script works:
- It examines various packages to ensure that there will be no conflicts and it finds any package conflict, it updates and uninstalls previous packages with yum cPanel on a Fresh OS.
- It also downloads language and base files for installation.
- Installs various Perl modules through CPAN and other required packages with yum.
- It downloads and compiles PHP and Apache with various associated modules.
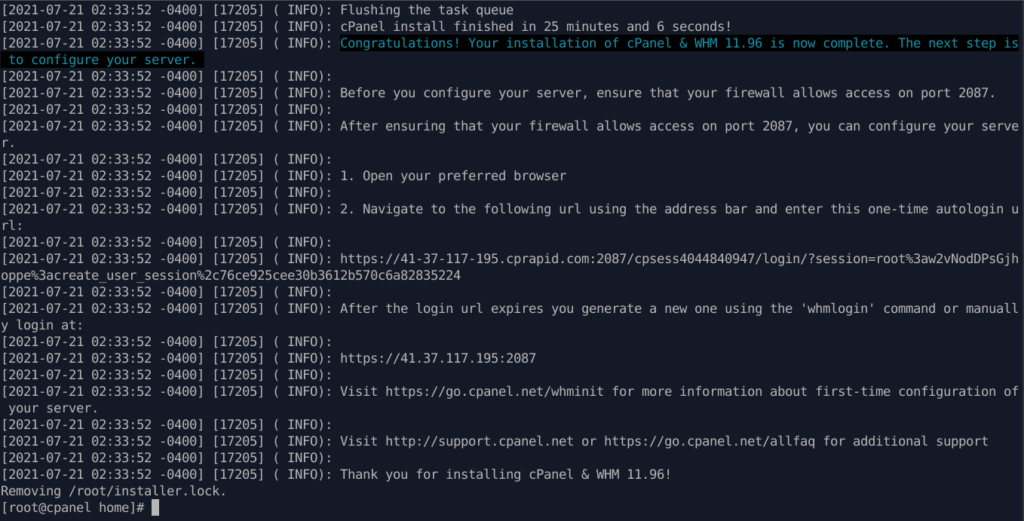
When the installation completes, you’ll view the output below. You may be asked to reboot the server after installation.
Step 5: Access WHM
After that, you need to complete the installation wizard from its web-based interface and you can access WHM with the following URL:

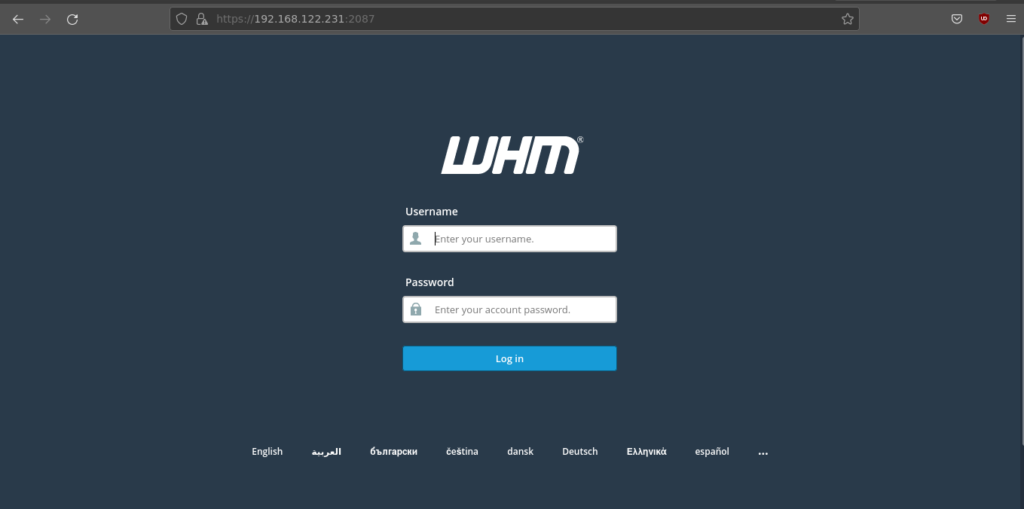
Now login with user “root” and your password. There are some more clicks remaining to complete the cPanel installation.
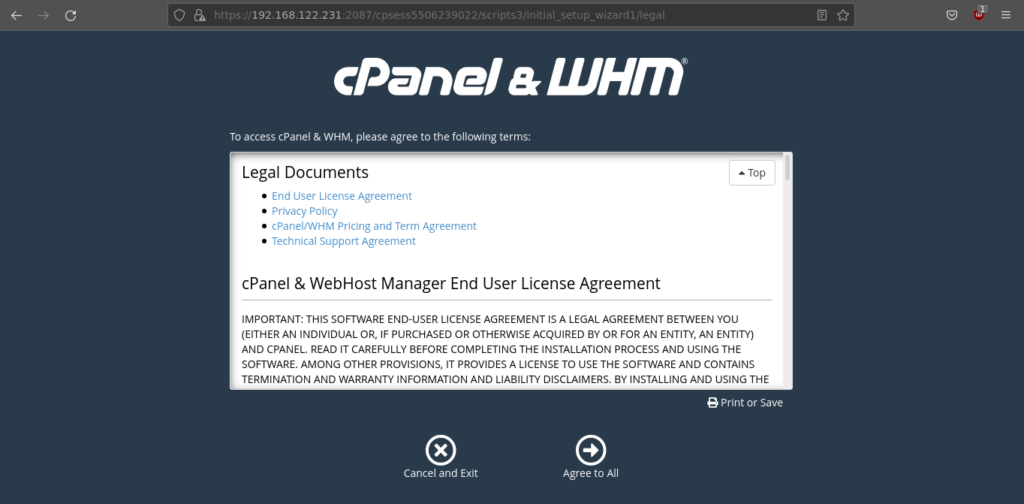
Step 6: End-User Agreement
Next, read the End User License Agreement and accept the terms.
Step 7: Enable cPanel
Then you’ll move to the Setup Networking section, provide your working email address and contact SMS address in the column “Server Contact Email Address” and “Server contact SMS address” respectively.
This will enable cPanel to send all important alerts, notifications to this Email-id (Recommended).
Step 8: Adding ISP Resolver
Next, move to the Hostname section, enter a valid FQDN hostname and Resolver entries for your server in the Networking section.
You can use Google resolvers in this section if you don’t have your ISP resolvers.
Step 9: Select the Main Network/Ethernet Device
Afterward, proceed to choose the Main Network/Ethernet Device, an IP available on that device will be considered as the main IP address of your server.
Then add your server static IP Address.
Step 10: Enable Quotas and Finishing the Installation of cPanel-WHM on CentOS 8
You can enable quotas which helps you to track down the disk space usages. Choose “Use file system quotas” and click on “Finish setup wizard” to complete the installation process.
Note:
If you don’t use file system quotas, then you will not be able to monitor the amount of disk space used by any user or website.
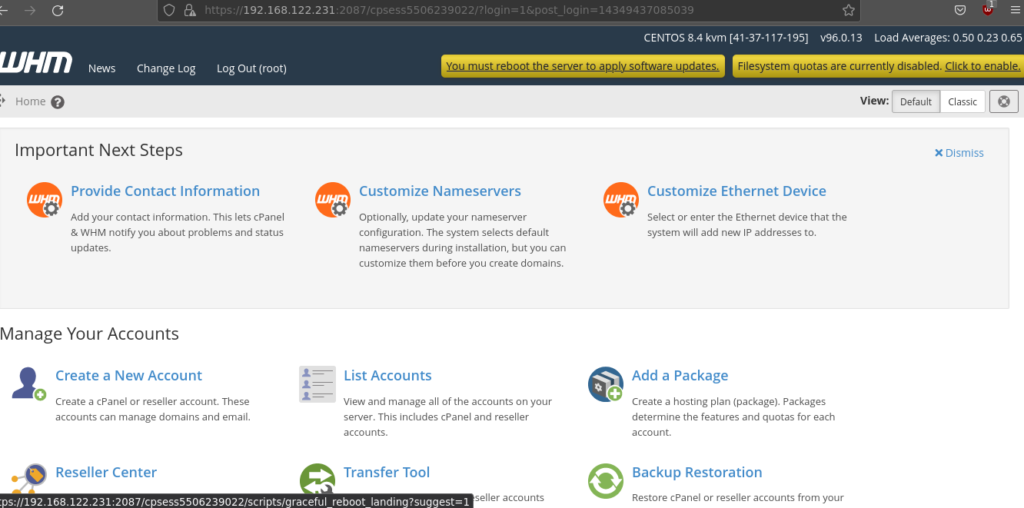
Once you are done with Installation, WHM’s home page will appear as shown in the screenshot below.
Note:
Sometimes, the cPanel installer script is not able to update the license because of the firewall or resolver’s entries and you’ll see a trial warning on the page. You can do it manually with the following command:

Remember that Cpanel is for user-level access and WHM is for root-level access, you need to create an account with the option available in WHM.
