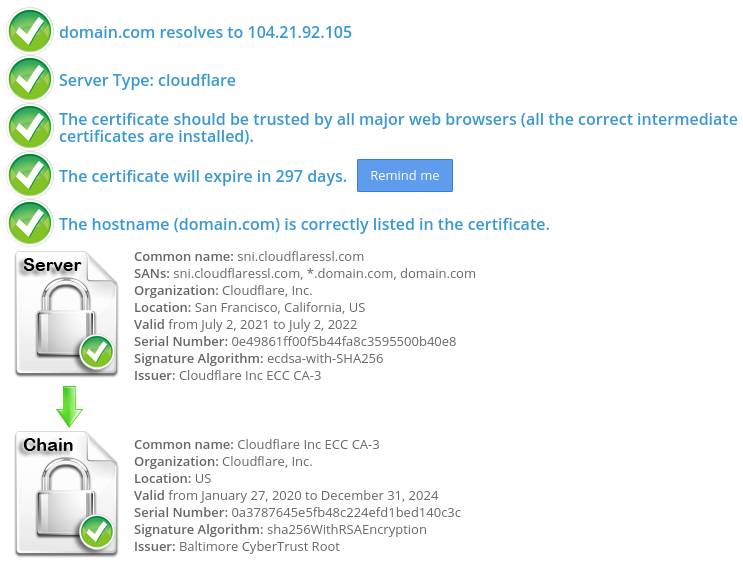
Installing Cloudflare SSL on Cpanel
If you do not want to purchase a commercial certificate or use the free Let’s Encrypt SSL, you’ll install Cloudflare SSL on your hosting plan. In this lesson, you’ll learn how to do this.
1) Log in to your Cloudflare system, select your domain. Click on the SSL/TLS icon -> Pick Origin Server tab -> Click Create button: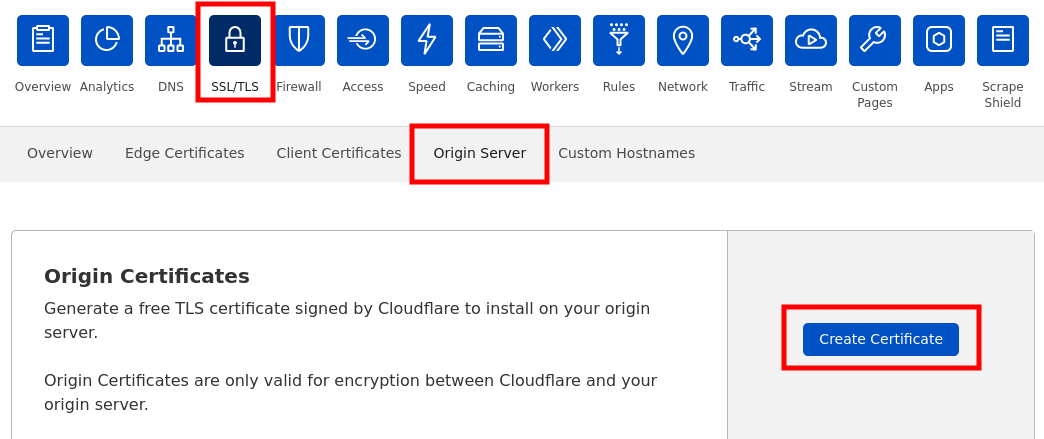
2) Settings should be the following:
– Generate private key and CSR with Cloudflare;
– Confirm your domain is indicated in Hostnames;
– Certificate Validity 15 years (Optional).
Click Create button: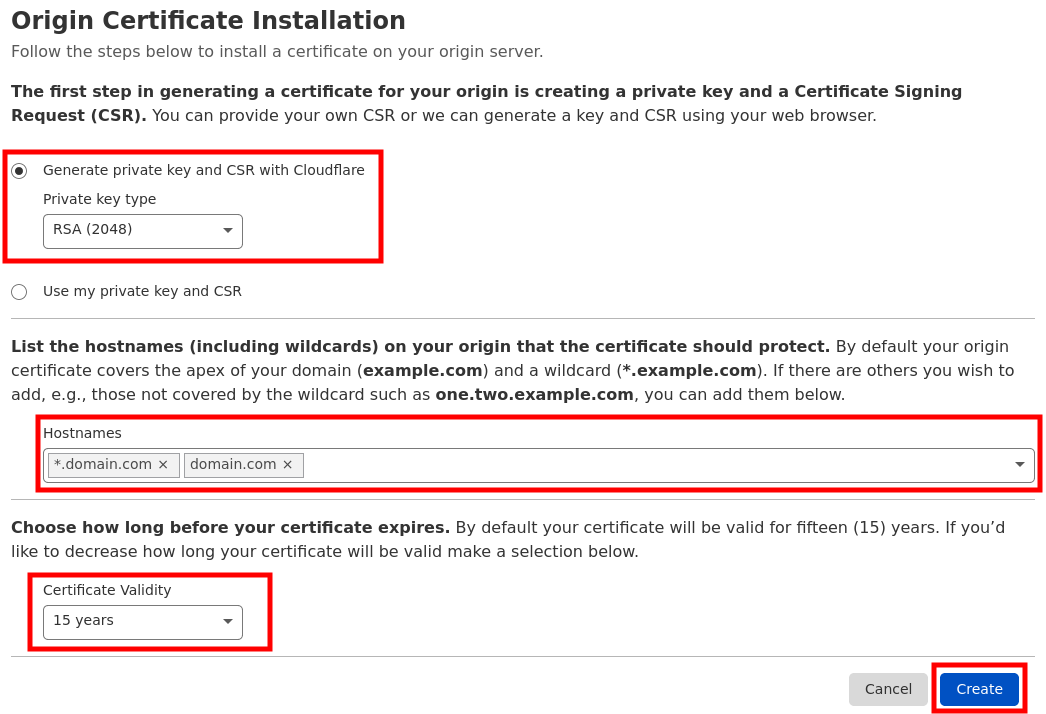
3) Copy-paste Origin Certificate and personal Key. You’ll need this information to install SSL on your server. The Key format should be PEM: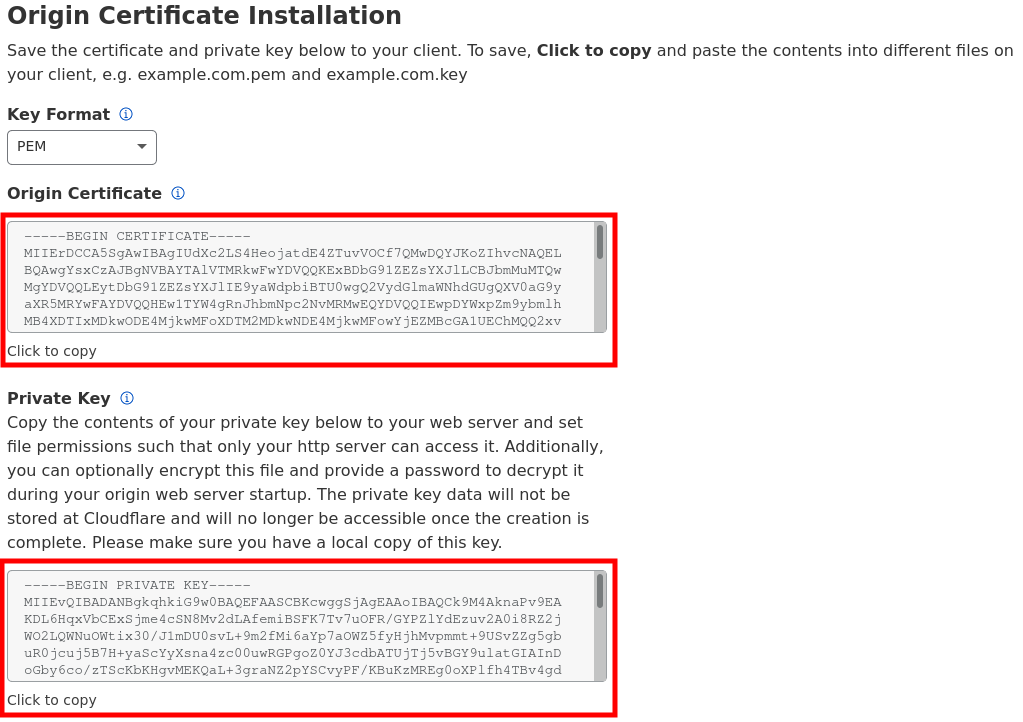
4) You’ll also need CA Bundle to establish the complete chain of trust. You’ll download the Cloudflare CA root certificate on this page. You’ll see two options there:
– Cloudflare Origin ECC PEM (do not use with Apache cPanel)
– Cloudflare Origin RSA PEM<- This is the one you need to Download
As a result, you’ll have 3 pieces of SSL:
1) Private Key;
2) Certificate or CRT (Origin Certificate);
3) Certificate Authority Bundle or CABUNDLE (Cloudflare Origin RSA PEM).
IMPORTANT
For SSL to work correctly, you’ll need to confirm that your domain’s record is Proxied on your Cloudflare DNS zone: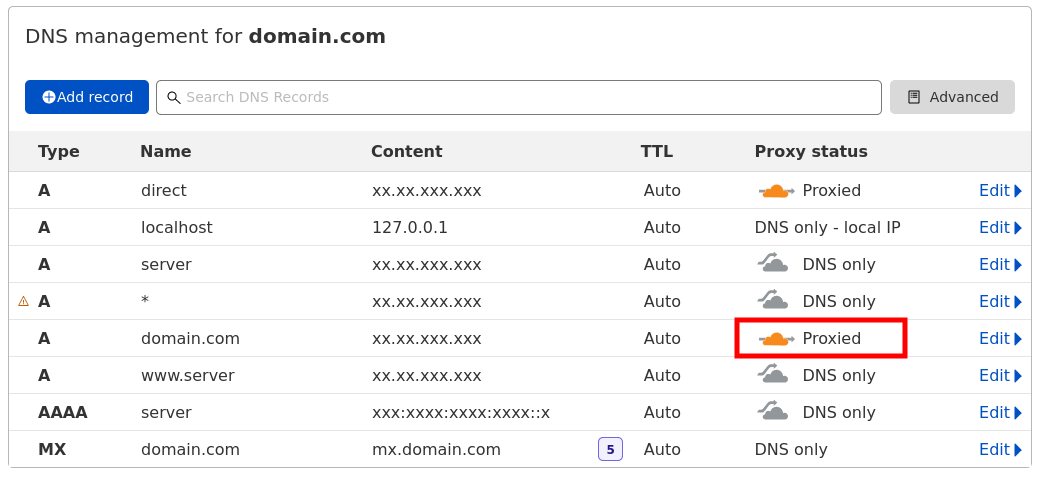
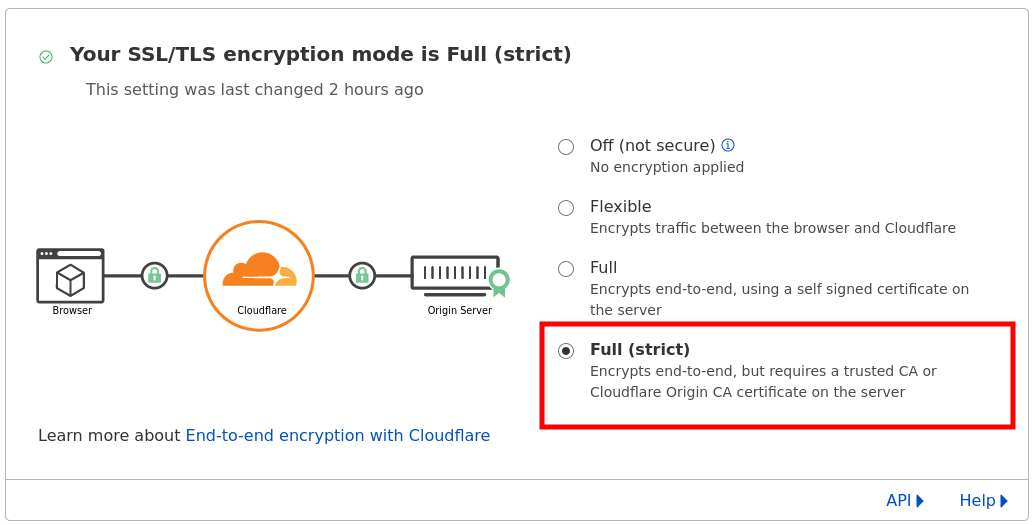
Also, you’ll need to enable Full (strict) SSL/TLS encryption in Cloudflare SSL/TLS -> Overview section:
That’s it! Congrats on installing Cloudflare SSL for your domain: